Introduction to MongoDB
MongoDB is an open source database that stores its data as collection of JSON like documents known as BSON or "Binary JSON", instead of tables with rows / columns. Technically, it is classified as a "NoSQL" database - a popular alternative to traditional Relational Databases (RDBMS):
NoSQL (“non SQL” or “not only SQL”) databases were developed in the late 2000s with a focus on scaling, fast queries, allowing for frequent application changes, and making programming simpler for developers. Relational databases accessed with SQL (Structured Query Language) were developed in the 1970s with a focus on reducing data duplication as storage was much more costly than developer time. SQL databases tend to have rigid, complex, tabular schemas and typically require expensive vertical scaling.
Some of the main benefits include:
Flexible data models
NoSQL databases typically have very flexible schemas. A flexible schema allows you to easily make changes to your database as requirements change. You can iterate quickly and continuously integrate new application features to provide value to your users faster.
Horizontal scaling
Most SQL databases require you to scale-up vertically (migrate to a larger, more expensive server) when you exceed the capacity requirements of your current server. Conversely, most NoSQL databases allow you to scale-out horizontally, meaning you can add cheaper commodity servers whenever you need to.
Fast queries
Queries in NoSQL databases can be faster than SQL databases. Why? Data in SQL databases is typically normalized, so queries for a single object or entity require you to join data from multiple tables. As your tables grow in size, the joins can become expensive. However, data in NoSQL databases is typically stored in a way that is optimized for queries. The rule of thumb when you use MongoDB is data that is accessed together should be stored together. Queries typically do not require joins, so the queries are very fast.
Easy for developers
Some NoSQL databases like MongoDB map their data structures to those of popular programming languages. This mapping allows developers to store their data in the same way that they use it in their application code. While it may seem like a trivial advantage, this mapping can allow developers to write less code, leading to faster development time and fewer bugs.
NoSQL vs Traditional SQL
As we have seen, one of the major differences between NoSQL and traditional SQL systems is the way the data is structured, ie: SQL databases are table-based. This means they use a rigid schema where data is organized into tables with rows and columns and primary / foreign keys to establish relationships between them. NoSQL databases however, can have different structures such as document-oriented (in the case of MongoDB), key-value pairs, or graph structures. In a NoSQL database, a document can contain key-value pairs and can be ordered and nested. Ths leads to additional benefits mentioned above, such horizontal scaling and fast queries.
Before we get started with MongoDB, we should be familiar with how some of the terms translate to traditional RDBMS:
| RDBMS term | MongoDB term |
|---|---|
| Table | Collection |
| Record | Document |
| Column | Field |
| Joins | Embed data or link to another collection |
See: MongoDB vs. MySQL Differences
Setting up a MongoDB Atlas account
MongoDB Atlas is a free online service that hosts MongoDB in the cloud:
MongoDB Atlas is a multi-cloud database service by the same people that build MongoDB. Atlas simplifies deploying and managing your databases while offering the versatility you need to build resilient and performant global applications on the cloud providers of your choice.
To get started, open https://www.mongodb.com/cloud/atlas and click the "Try free" button.
This will take you to the "register" page, where you can either create an account with Atlas, or sign in with Google. If you prefer to sign in with GitHub, you can proceed directly to: https://account.mongodb.com/account/login and click the "GitHub" button.
Once you have logged in, you should be prompted to "Create a deployment". To begin:
Click the "+ Create" button to continue.
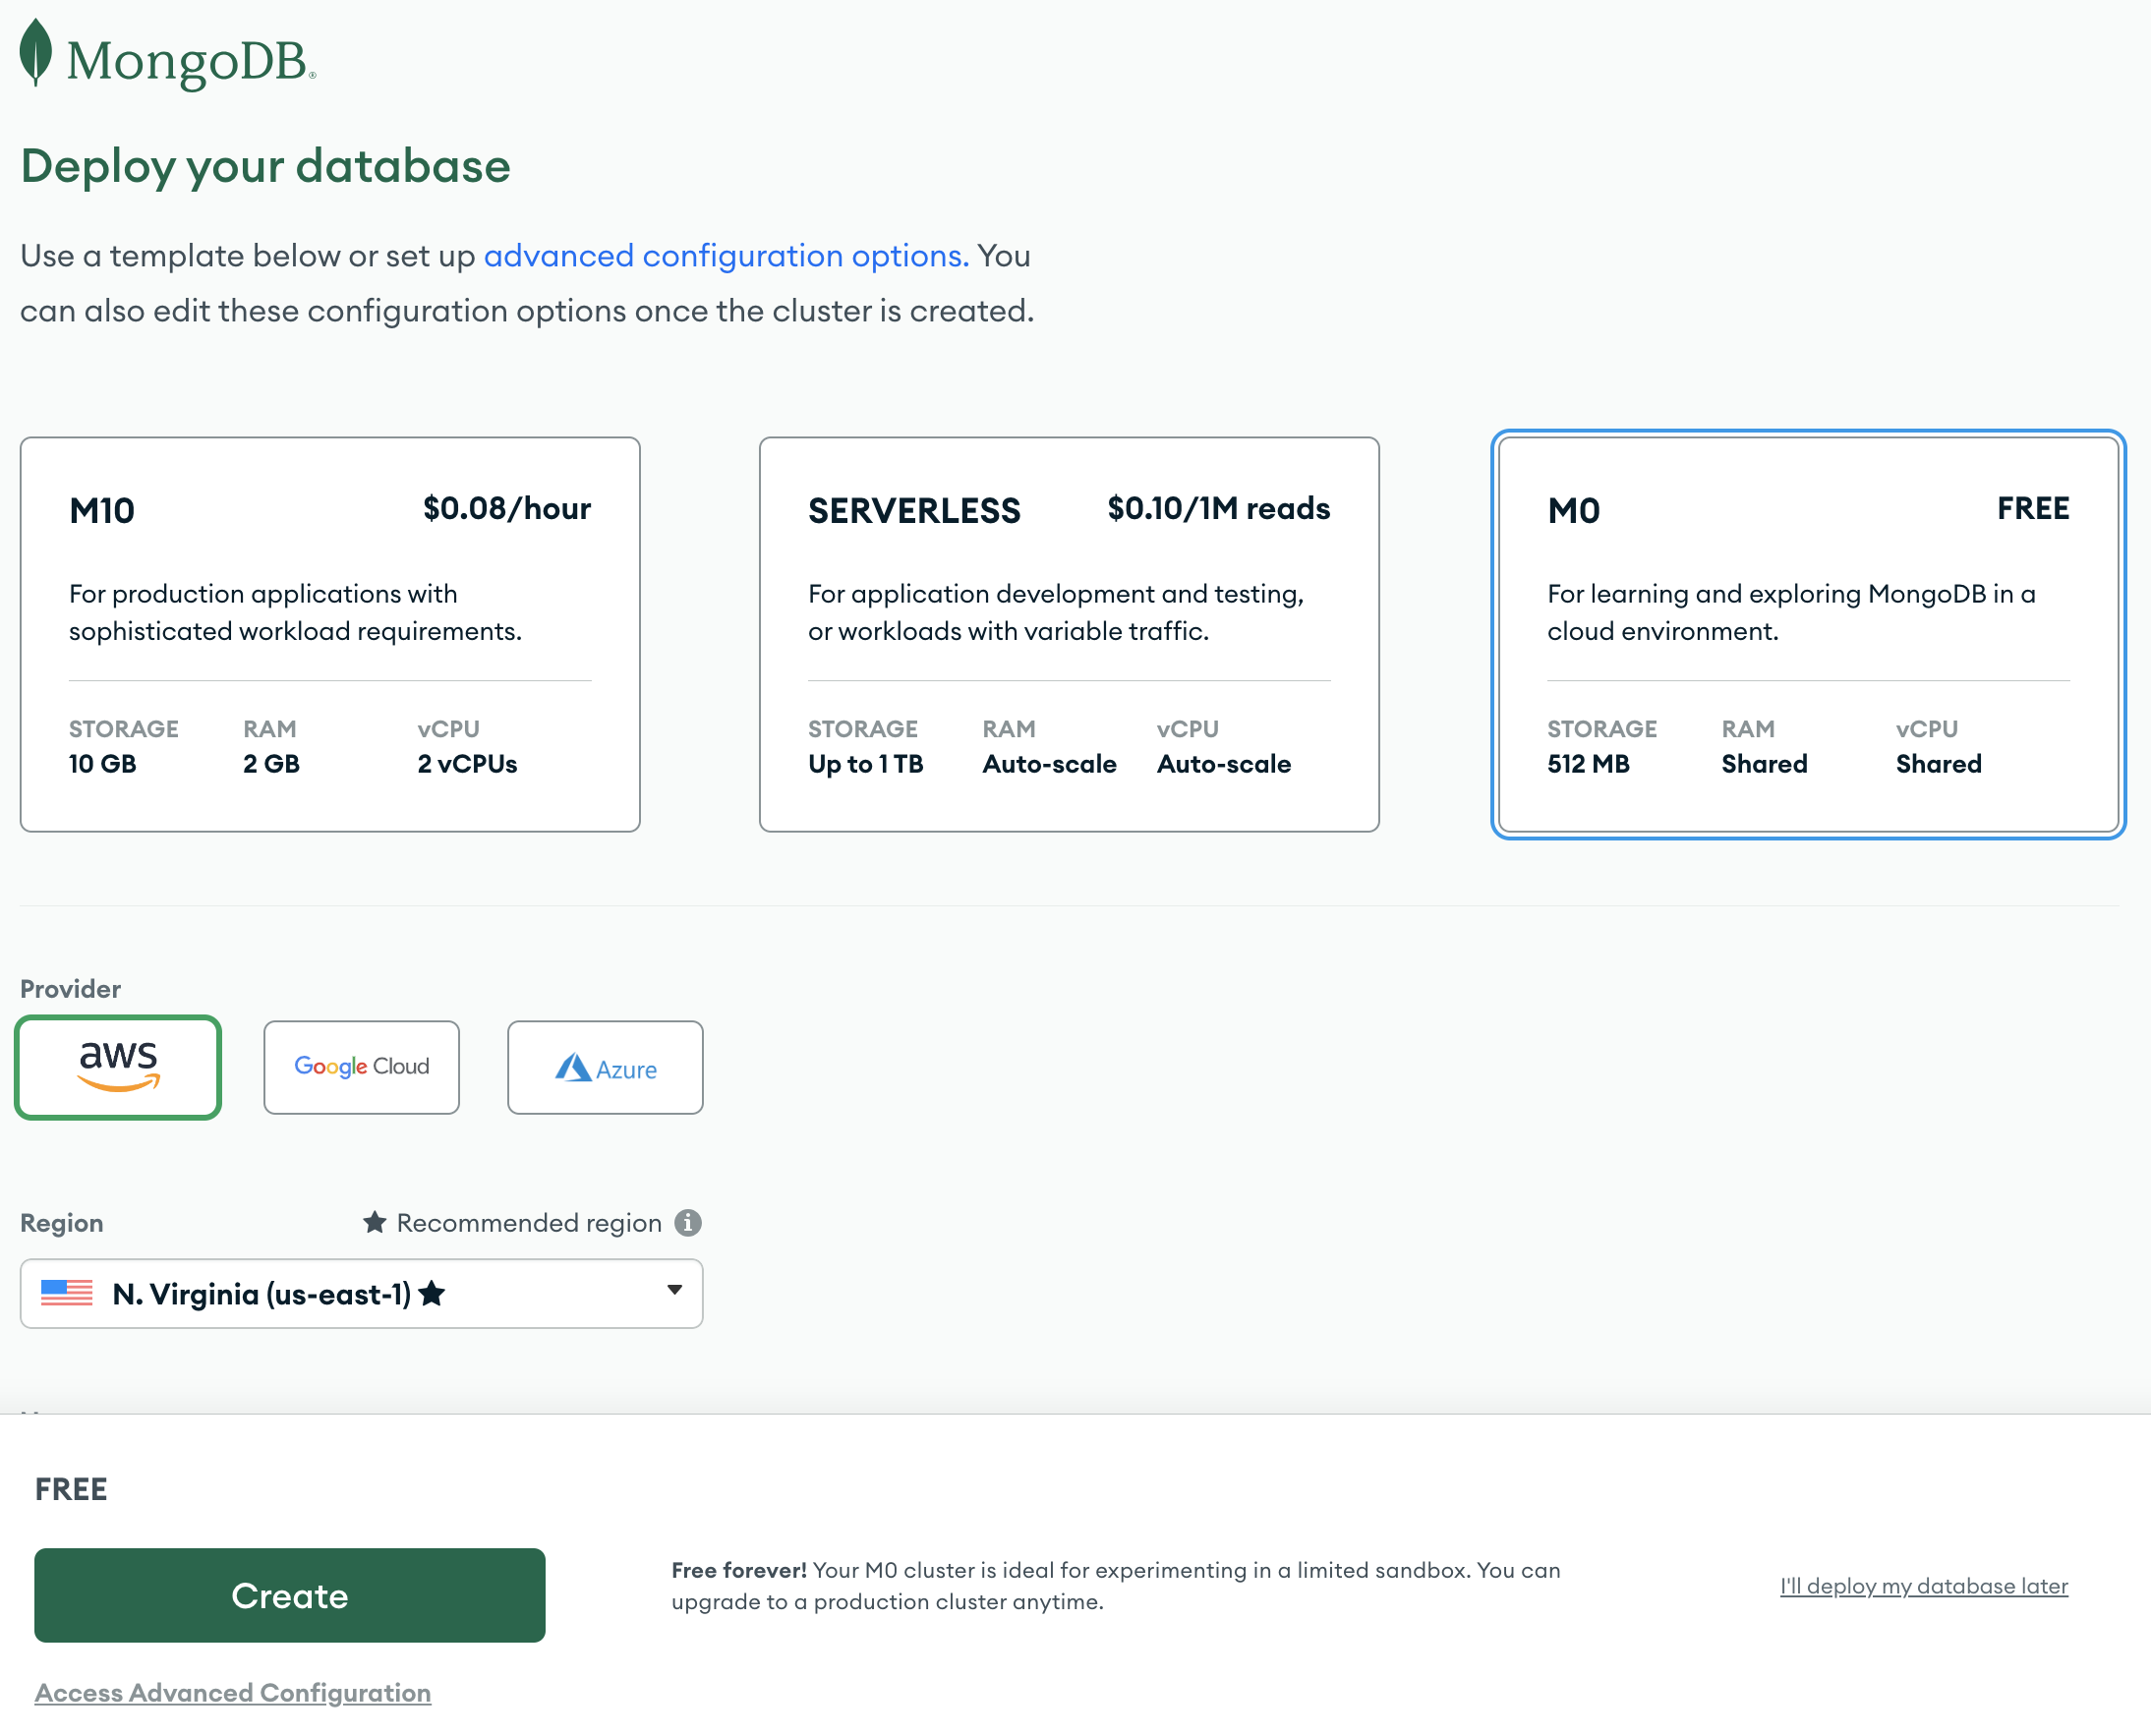
At the next screen, we will see the "Deploy your database" options. Be sure to Choose the "FREE" option before clicking the large, green "Create" button:

You will then be taken to the "Security Quickstart" screen, which should have the "Username and Password" option checked with a form containing pre-filled values for the "Username" and "Password". Write these down as we will need them later, and click the green "Create User" button
With this section complete, you should be taken to a "Where would you like to connect from?" screen with "My Local Environment" selected and an "IP Access List". For now, we will allow access from anywhere, so ensure that you enter the following values "0.0.0.0/0" and "any" before clicking the "Add Entry" button:

Finally, click the "Finish and Close" button
Obtaining your Connection String
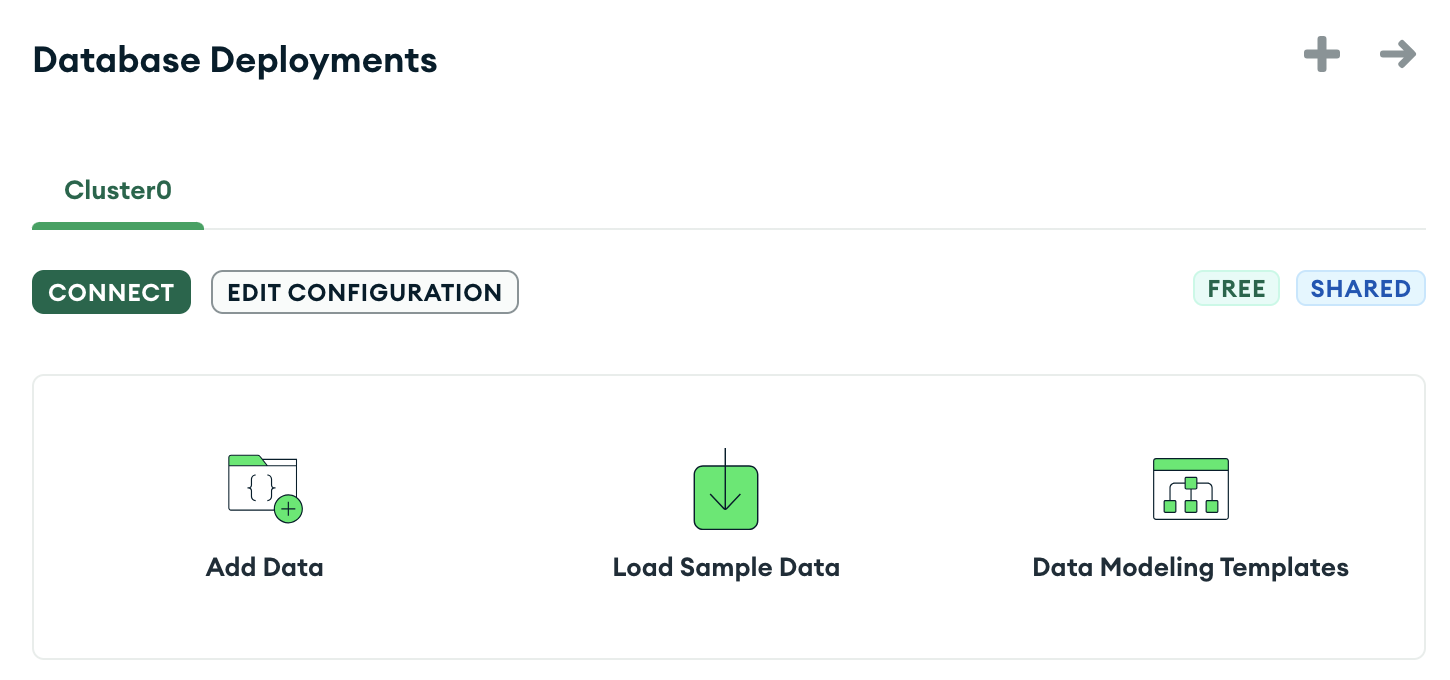
Once your cluster has been created, you should be taken to the "Overview" screen, where we can view our deployments.

From here, click the "CONNECT" button and choose the "Drivers" option

Scroll down to "3. Add your connection string into your application code" and write down the connection string (we will need it later) - it should look something like:
mongodb+srv://user:<password>@cluster0.abc123.mongodb.net/?retryWrites=true&w=majorityFinally, replace the <password> value with the password recorded from earlier, ie:
mongodb+srv://user:yourPassword@cluster0.abc123.mongodb.net/?retryWrites=true&w=majorityand click the "Close" button to return to the "Overview" screen.